A budget can be created from the cashbook actuals by importing the previous year's data. This will give you a guide or template to make adjustments, amendments and updates to assist in creating your first budget.
Follow the instructions listed below:
- From the Home Page click on Budget.

- Click on Full Budget.

- Click on New Budget.
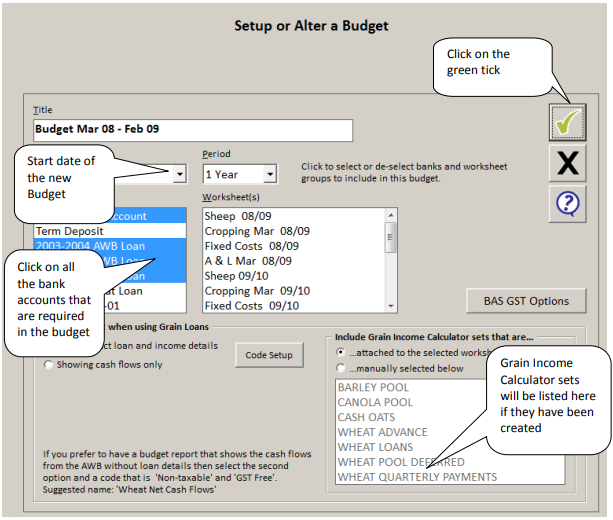
- The message below will appear if you have any Grain Income Calculator sets (GIC’s) already
completed within Agrimaster.- Click Yes if you don’t want to join the GIC’s to your budget, or click No if you do want them attached.
- You will then have to select the required GIC sets required from the bottom right-hand box of the screen shown above by clicking on the name of each GIC.
- This creates an empty budget.
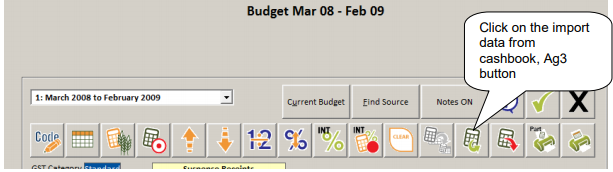
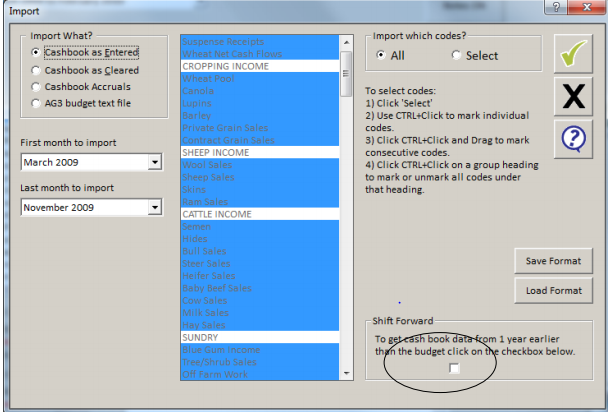
- To import data from cashbook click Import Data.

- Tick the Shift Forward box on the bottom right-hand side.
- Change the First month to import and the Last month to import to the 12 months prior to
the current required budget months.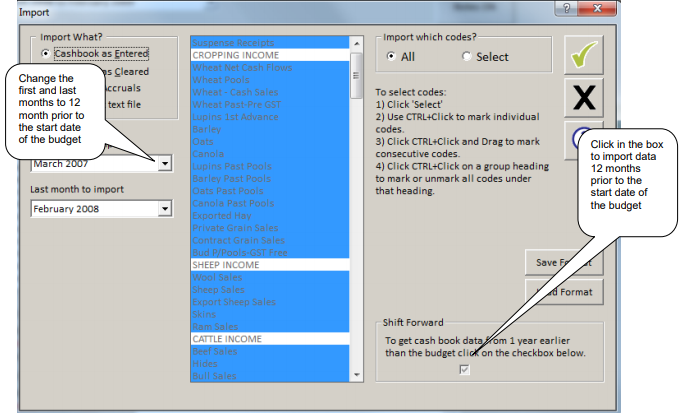
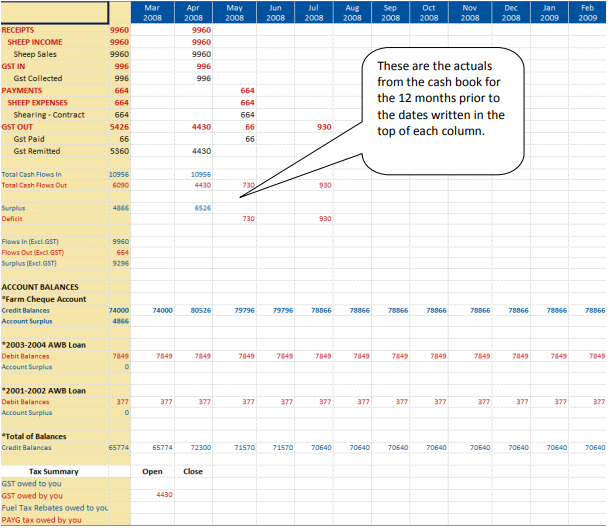
- The result of the importation is actuals for the same months of your new budget but the last
12 months this period appeared in the cashbook. You will need to update, adjust and amend
these figures to tailor the budget to the new budget period. - Click on the printer icon to display the full budget.
- Please Note: If you are already partly into the new budgeted year, you can import the current actuals over the old 12-month actuals.
For example, in the budget displayed above, if the day of the import is 30th December 2005, then you can import the real actuals for July 2005 to December 2005 over the top of the 2004 values.
- Please Note: If you are already partly into the new budgeted year, you can import the current actuals over the old 12-month actuals.
- To import the current actuals over the old data, click on the black cross to return to the front page of the budget.
- To import data from the cashbook, click on the Import from cashbook (Ag3) button.

- Make sure the Shift Forward checkbox does not have a tick in it.
- Select the period from the start of the budget to the current month (day of importing the actuals).
- Click on the green tick to confirm.
- The last 6-months of actuals data will now be in greyed out rows and columns.
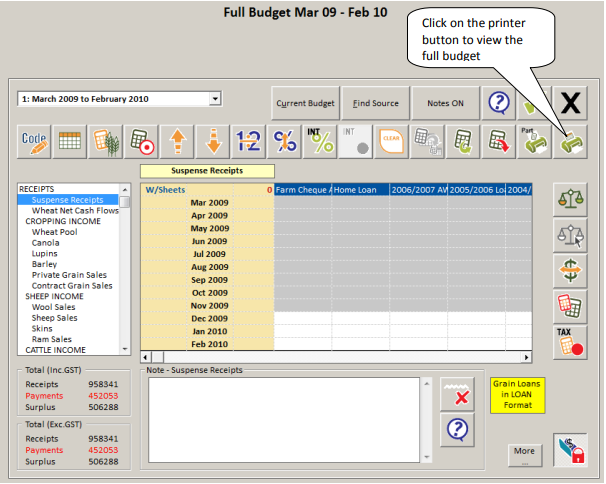
- Click on the All/Printer button to display the Full Budget.
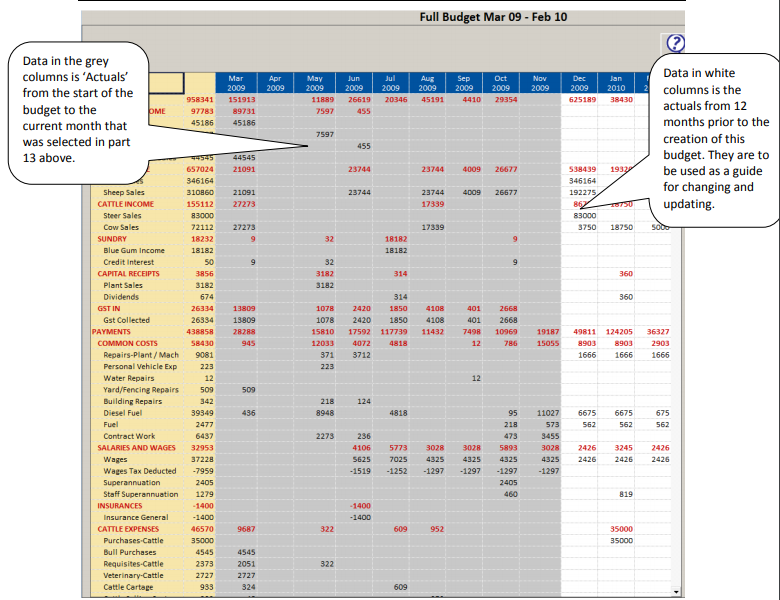
- Data in the white columns can be used as a guide to change, amended and updated as
required.
Please Note: There will be no worksheets behind the Full Budget until you create and complete them. This is because the actuals you have imported draw from the cashbook alone. Worksheets need to be created individually and then linked to the Full Budget via the Change Budget Setup button on the Full Budgets menu screen.
Comments